6. Reading four buttons
Used imports in this chapter
use defmt::{info, unwrap};
use embassy_executor::Spawner;
use embassy_futures::select::select4;
use embassy_futures::yield_now;
use embassy_nrf::gpio::{AnyPin, Input, Pull};
use embassy_nrf::peripherals::SPI3;
use embassy_nrf::{
    bind_interrupts,
    gpio::{Level, Output, OutputDrive},
    peripherals, spim,
};
use embassy_sync::signal::Signal;
use embassy_sync::{blocking_mutex::raw::NoopRawMutex, mutex::Mutex};
use embedded_graphics::pixelcolor::raw::RawU16;
use embedded_graphics::{
    image::{Image, ImageRaw, ImageRawLE},
    pixelcolor::Rgb565,
    prelude::*,
};
use static_cell::StaticCell;
use {defmt_rtt as _, panic_probe as _};
Phew, that were a few tough chapters. Luckily this chapter is easier. In this chapter we will read out the four buttons available on the development kit in an async fashion.
Acquiring the resources and starting the task
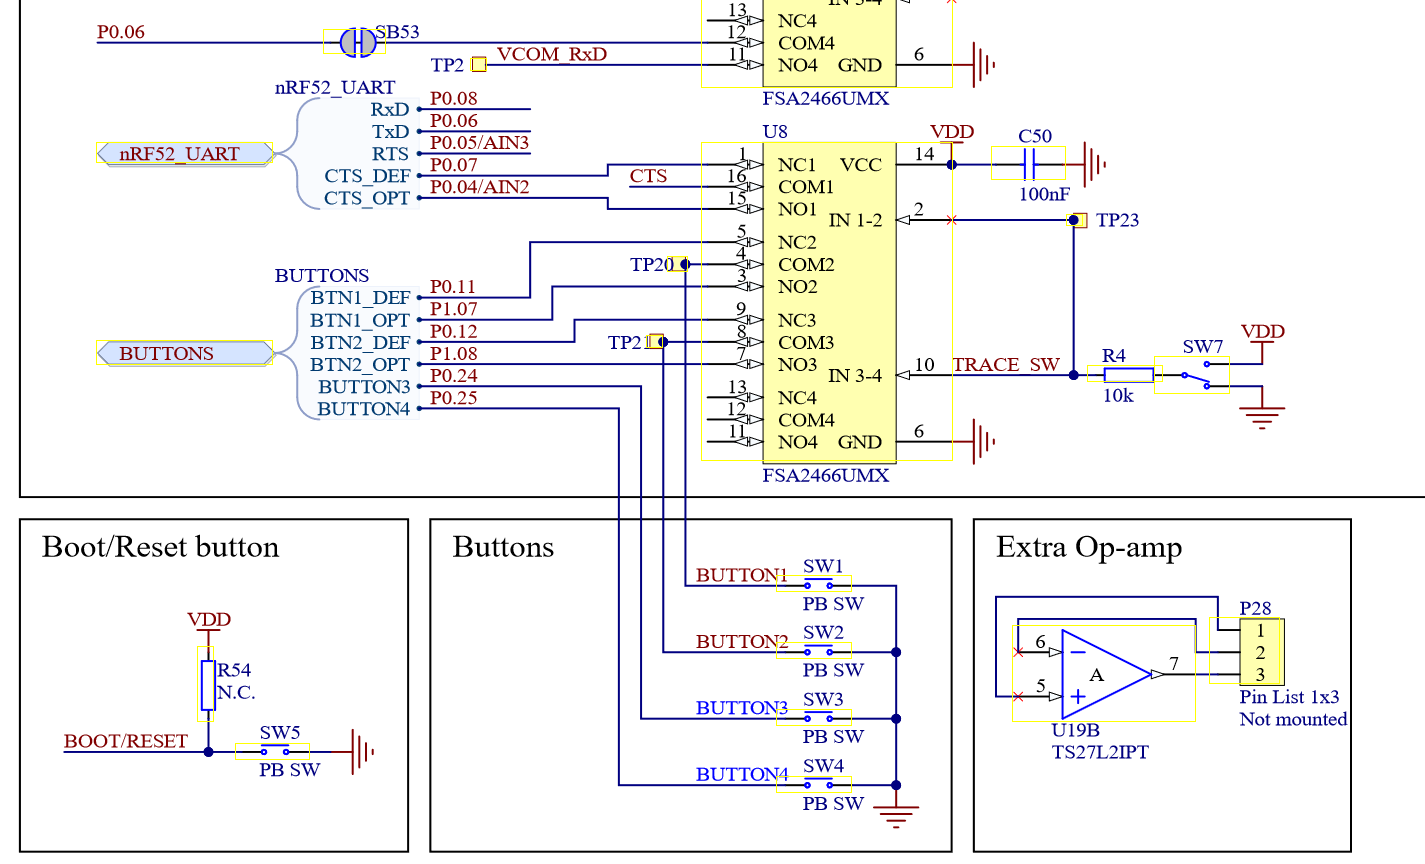
On the development kit, there are four buttons connected to pins P0.11, P0.12, P0.24, and P0.25.
The first two buttons are however also bound to two other pins, but the only difference here is that the logic is inverted.
Add the following code before starting the draw_task async function.
In the following steps, we will define the input_handler.
unwrap!(spawner.spawn(input_handler((
    p.P0_11.into(), // btn 1
    p.P0_12.into(), // btn 2
    p.P0_24.into(), // btn 3
    p.P0_25.into(), // btn 4
))));
The input handler task
This task will be responsible for listening to the input events generated by the buttons. For now, we will be content with logging the current state to our computer.
Configure the pins as Inputs with their Pull::Up mode.
If a pin is in Pull::Up mode, a high read signifies that the button is not pressed and a low read signifies that it is pressed.
Add the following code to the project and fill in the todo!s:
#[embassy_executor::task]
async fn input_handler(btns: (AnyPin, AnyPin, AnyPin, AnyPin)) {
    let mut btn1 = todo!();
    let mut btn2 = todo!();
    let mut btn3 = todo!();
    let mut btn4 = todo!();

    loop {
        // wait for any of the following 4 futures to complete
        // and use this as the result of the select4. This also
        // cancels the other 3 futures, but in our case this does not
        // matter.
        // Beware: Not all futures can be canceled -> read the docs
        select4(
            btn1.wait_for_any_edge(), // fires for either a rising, or falling edge
            btn2.wait_for_any_edge(),
            btn3.wait_for_any_edge(),
            btn4.wait_for_any_edge(),
        )
        .await; // wait for next button change

        info!( // fill in so we see a correct result
            "Detected input change 1: {}, 2: {}, 3: {}, 4: {}",
            todo!(),
            todo!(),
            todo!(),
            todo!()
        );
    }
}
Solution: AnyPin initialization
let mut btn1 = Input::new(btns.0, Pull::Up);
let mut btn2 = Input::new(btns.1, Pull::Up);
let mut btn3 = Input::new(btns.2, Pull::Up);
let mut btn4 = Input::new(btns.3, Pull::Up);
Solution: Reading out the button state
// log current state
info!(
    "Detected input change 1: {}, 2: {}, 3: {}, 4: {}",
    btn1.is_low(),
    btn2.is_low(),
    btn3.is_low(),
    btn4.is_low()
);
That's all for this chapter! Now flash the resulting code to your development kit and observe how the button events get triggered and logged. Do you observe something unusual? Do you always see all events? What about input delay? This is something we will fix in the next chapter.